A New Adventure: Writing101 and Thoughts on Happiness

About a week ago, a post from the WordPress staff popped up on my reader, talking about a blogging course they were running called Writing101. Intrigued, I read on and saw the course means each participant receives a prompt by email every weekday for 4 weeks, and the aim of the course is to get bloggers writing every day. My inital reaction was that there’s no way I’d have time to blog EVERY DAY, but then I thought about the time I spend on the train on the way to and from work, and the fact that I really quite enjoy writing… ‘I’ll like it, and come back to it later’ I thought, closed the tab and looked at something else. But a quote somewhere about there never being a ‘right time’ brought me back to thinking about it. ‘You know what? I’ll sign up to it right now!’ So I did.

And this brings me to today- the first day of the course! The first prompt today is to freely write about whatever enters my head for 20 minutes. So here I am, kneeling on my bed with my timer on my phone and a Keane album (‘Night train’) playing in the background.

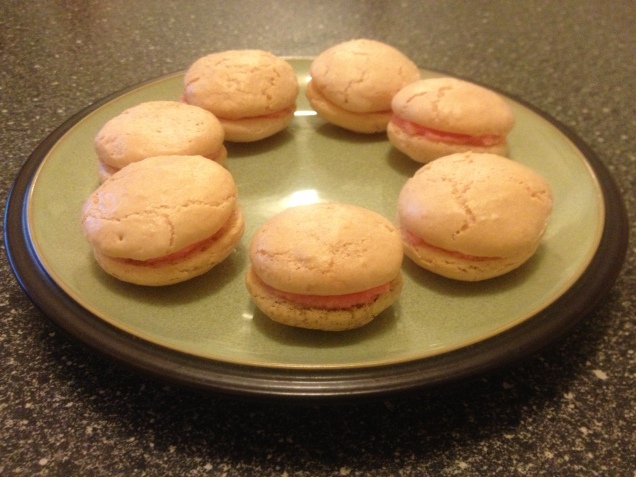
Today has been the first lovely sunny day that I’ve spent mostly at home this year and I have tried to make the most of it- I baked an Easter cake this morning, then sat outside with the cats, reading a book on my Ipad. The book I’m reading at the moment is called ‘The Happiness Project’ by Gretchen Rubin. I haven’t been completely nose in book constantly, preferring to read maybe a chapter at a time in the bath etc, but I’m rather enjoying it. The Author decided to embark on her own ‘Happiness Project’ because she felt that although she had plenty of things in her life that she was very happy with and lots that she wanted, she didn’t feel as happy on a day to day basis as she thought she should. This is something I have previously felt about myself- that it’s important to be grateful for what we have and to be happy and in the moment more often. It can be difficult sometimes, as if there are difficulties in your every day life or simply things that are ‘fine’ it can be easy to focus on looking forward to things or remembering past events.

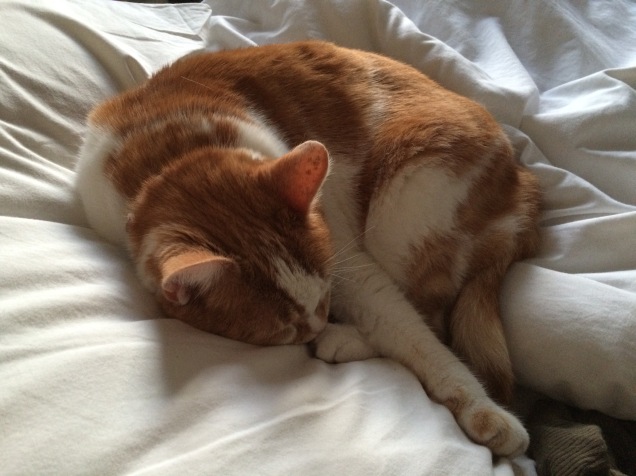
The chapter I’ve just finished has just mentioned about the phenomenon of looking forward to something and thinking ‘I’ll be happy when this happens’ but then when the something actually happens, a lot of the time there are other things going on that detract from the happiness, and you almost get more happiness by thinking about looking forward to it than the thing itself! That’s why living in the moment is important. Right now I am happy that my cat, Topaz, is sat next to me on my bed, and that the sun is just starting to go down so it’s still light at 18:48. I’m listening to music I want to sing along to, and my dinner (something I like) is in the oven. They are simple little things, but recognizing that these make me happy is a distraction from the big over arching things that it’s oh to easy to pin your hopes on – a dream career or job, even knowing what that job you want to do is, your relationships with friends, family or significant other, holidays etc. ‘When I get that job, I’ll be happy.’ The way I see it, things will be different, maybe you will get happiness from the actual job, maybe from the fact that you can afford certain things, maybe your lifestyle will change. And that’s great! But there will also be stresses (I can afford to move out! But where will I live?!) and soon, that lifestyle will become the norm too. So I’d like to appreciate the little things that happen every day more.

That’s actually why I’ve been trying to make more of an effort with blogging and Instagram. The little feeling of happiness I get from taking a really good picture is a boost for the day, so I want to share it with others. And the same feeling from having created something- baking or craft… and actually writing. I get a sense of achievement from writing something I am proud of- that I feel flows well. We will see how I feel about this when I’m finished! The ‘twist’ with this email prompt from WordPress today is to bite the bullet and publish what I’ve written.

Funnily enough the timer’s just stopped… I think I’ll be brave and hit publish.

Note: I did proofread and edit this a tiny bit, but less than 5 minutes worth, honest! 

IMG_7729
Topaz- one of my gorgeous cats!


Adapting Cake Recipes: Do’s and Don’ts Part 2: Ingredients!

Earlier this week I wrote a blog post about cutting corners in the actual method of cake baking. This is part 2 of the topic and I’ll be talking about ingredients and where you can swap certain things in or out.

These posts are aimed at anyone who’s not so confident about adapting recipes and wants a little help to avoid a baking disaster. I’m not a master baker and my suggestions aren’t fool proof, but they work pretty well for me, and hopefully they will for you too!

Basic Ingredient Substitutions

The main ingredients in most cakes are: flour, sugar, eggs and butter. I wouldn’t suggest substituting these for anything else in your store cupboards unless it is within the same group, or for example if you were making a gluten/egg/dairy free cake. I’m afraid I can’t really offer much advice on that, I haven’t much experience in the matter. The only thing I would suggest is to think about what the ingredient is in the cake for, and substitute something similar in. As I say, I haven’t actually tried any of these but flour is a general bulk ingredient, so ground almonds or coconut flour might be a good bet. Sugar could probably be switched for Stevia or a natural powdered sugar, and butter is a fat, so using vegetable oil might work, as it does with muffins. Eggs are used to help a cake rise and also to bind everything together… I don’t know what to suggest as a substitute for them, they’re kind of a magic ingredient! Quantities might also vary, so it’s best to do some research first.

Substituting within a group however, is quite easy. If a recipe calls for caster sugar, using brown sugar will give a slightly different flavour and may change the texture a little, but the recipe will work. Using medium eggs instead of large will also work but you might want to make sure they are well beaten and add a tablespoon or two of milk at the end to make sure the mixture feels like the right consistency. Use your own judgement with that one. Using self raising flour instead of plain is fine, just go easy on the baking powder or bicarbonate of soda if the recipe calls for it. These are raising agents and self raising flour already has some of this in. If you only have plain flour, adding baking powder will create the equivalent of self raising. The Hummingbird Bakery suggests that adding approx 1/2 a teaspoon for every 100g of flour will be about the same- they have a particularly good post on baking powder and bicarbonate of soda here. Personally, I use unsalted and salted butter interchangeably. I feel like we get enough hidden salt in our diets in the UK already from pre prepared food and I don’t notice the taste difference in cakes enough to warrant using salted over unsalted butter, so I always favour unsalted.

IMG_6288
Having fun with decorating! This is a chocolate cake with peanut butter and chocolate buttercream and is surrounded by KitKats!

Not So Basic Ingredients

Generally these are the additions to a cake that are fine to substitute and vary the quantity of a little such as dried fruit, chocolate chips, vanilla essence, rose water, etc. For example, if a carrot cake recipe asks you to add walnuts and you don’t like them, it’s fine to leave them out completely, or swap in some nuts you do like. If a cake requires 75g of raisins and you have 100g of choc chips you want to use up, chuck them all in. I’d suggest not deviating from the recipe by more than about + 30-50g of ‘additions’ though. Again, best to use your judgement depending on the type and size of cake. However there are a few exceptions. I would watch out if a recipe uses things like ground almonds (almond meal) or if the chocolate is melted as these are likely to be part of the body of the cake rather than additions to the cake. Some cakes substitute flour completely for ground almonds- you’d be left a bit of a mess if you substituted some chocolate chunks for the almonds in a cake like that!

Flavouring

As a general rule, if you are making any vanilla or plain cake you can add cocoa powder, ground spices, orange/lemon zest or pretty much any flavouring to your taste to the cake. Beware when flavouring with liquids though (e.g. lemon juice) as more than a couple of tablespoons may alter the consistency of the cake a fair bit. A small tip with citrus fruit- if you use just zest, the flavour can be a little bitter, so I suggest using some juice as well.

Icing and Decoration

Icing and decorations rarely affect the body of the cake, so you can usually use pretty much whatever you like. I would advise finding a basic recipe for buttercream that can ice 12 cupcakes or one large cake and using it as your stock recipe. You can then add a little cocoa powder, food colourings or flavourings as required for each cake you make, but always rely on your tried and tested buttercream base. You can also easily pop your favourite jam in the middle of your cake instead of (or as well as!) buttercream, or even chocolate spread. I use royal icing on my Christmas cake, which is made with egg whites and icing sugar and dries into a firmer icing. For toppings like this, chocolate ganache and other more complex cake coverings I would stick closely to the recipe!

IMG_0550
Vanilla cupcakes with strawberry buttercream icing- some of my favourite cupcakes!

I hope you’ve enjoyed my little cake baking feature, and that it may have helped you learn something new. If you have any thoughts on my suggestions, alternative ideas or if you too skip sieving, let me know in the comments!


This blog post was fuelled by an Elton John playlist!

Adapting Cake Recipes: Do’s and Don’ts!

It’s never fun when your cakes don’t work, especially when you’re baking for a special occasion. Unfortunately this weekend I experienced a few issues with a cake I was making for Mother’s Day. It was a recipe I hadn’t used before and I cut a few corners that I shouldn’t have, ending up with a tub of cake instead of the beautifully decorated ring cake I had aimed for! This inspired me to share what I have learnt over the years about where you can change a baking recipe to suit you, and where you shouldn’t!

I would say I’m an intermediate baker, I’ve been baking for years but I am by no means an expert and I am completely self (or family) taught. The views in this post are just my opinions based on my own experience. There aren’t really any hard and fast rules for every cake, but I am giving some general guidance which seems to work for me!

I’ve split this post into two, as it was getting very long. This part is more about the method and equipment used. The next part will be about ingredients.

My turned out Caramel Mud Cake for Mother’s Day. Whoops!

Tins

ALWAYS grease the tin, and use baking parchment (baking paper, greaseproof paper) or flour the tin when a recipe tells you to! This was the main problem with my crumbled Mother’s Day cake- I used a ring tin instead of a loose bottomed circular tin, and because it was fluted I didn’t bother using baking paper. Lo and behold, it stuck to the tin! By all means use different tins to the ones a recipe suggests, but bare in mind that you must prepare it in the same way, and the cake might not turn out in quite the same way as it would have with the correct tin. A general rule is to aim for the tin to have a similar volume. For example, using a square 18cm x 18cm tin instead of a circular 20cm tin will probably be fine, but using a 23cm x 23cm square tin will result in a much thinner cake, which may cook best at a different temperature or be done in a different time. Just be sure to keep checking it!

I broke the cake up some more and put it in an airtight container to decide what to do next. Maybe some cake pops, or a trifle…?

 General Making:

Sieving: pretty much all baking recipes which use flour will tell you to sieve it. I usually don’t. The trouble with not sieving your flour is that sometimes your recipe will turn out fine and sometimes it will have lots of little pockets of flour in once baked, which don’t taste or look good! It shouldn’t affect the rise or form of your cake and sometimes lots of mixing will get rid of the pockets but sometimes it won’t! If you’re just baking for yourself or your family then fine, but if you’re baking to impress be sure to give the flour a sieve, and the same goes for icing sugar if you’re using it.

Microwaving Butter:It’s so easy to forget to leave the butter out of the fridge to soften before you need it, or to be doing some spontaneous cake making and therefore not to have known you’d need to leave it out. Microwaving the butter can be a quick fix, but make sure you’re careful not to over microwave it. Creaming together butter and sugar can be difficult if your butter is now a liquid! I’d advise just microwaving it for 10 seconds then checking it with a spoon in several parts- the butter on the outside of the bowl might be firm but the inside might be soft enough. You can always heat it for longer. Give it all a good beat to make sure its all the same consistency before you add any more ingredients.

IMG_1900
Marbled coffee cake with white chocolate ganache. An example of when using baking paper worked!

Basic Cake Method:

If you have a recipe that you hastily copied down and perhaps has parts missing, or one that tells you to put everything in your Kitchen Aid and hit ‘go’, but you don’t have a mixer or want to do it by hand this is a basic method that works for most cakes.

Cream together your butter and sugar, then beat in your eggs. (A handheld electric mixer is very useful at this point). Beat the mixture until you think it’s evenly combined, then a little longer. Sift in your flour in thirds and fold it in slowly along with any baking powder, bicarbonate of soda, flavouring or colouring ingredients (e.g. cocoa powder, dried fruit, chocolate chunks, food colouring, vanilla essence etc). Pour it all into a tin and pop it in the oven. Gas mark 4-5 or 180-190 degrees is usually a good bet for a fairly standard sponge cake. Then keep checking it; the smaller your tin/cake case, and the higher in the oven it is (if its not a fan oven) the quicker your cake will bake. To check it, pop a skewer or small sharp knife into the cake in the centre or a few thickest points and see if it comes out clean. If it does, the cake is cooked. If not, it needs a few minutes longer.

Opening/Closing the Oven Door:

This may seem like a strange one but it can affect your cake! Always try to open and close your oven door slowly and gradually rather than yanking it open or slamming it shut. Doing this quickly can cause air to rush in or out of your oven and this can make your cake sink or collapse in the middle. This really sucks, especially if you’re making a non-iced cake like a lemon drizzle or general pound cake- sometimes you can save a mildly sunken cake using a little extra icing.

Heating/Melting:

If your recipe calls for you to melt some ingredients together (e.g. butter, sugar, chocolate) and then add eggs, always make sure your mixture has cooled for at least 20 mins first, unless of course you fancy scrambled eggs in your cake…!

If worst comes to worst though, you can sometimes save a cake…

How I ended up ‘styling out’ my crumbled cake. Topped with icing, chopped pistachios and sliced figs.

Check back soon for part 2 of this feature, where I will be talking about ingredient substitutions. I hope you’ve enjoyed this blog about cake baking methods, do let me know if you liked it, have any thoughts or would like me to do more of these kind of posts! It’s quite fun sharing what I’ve learnt from my experiences of baking and I’m always interested in other peoples’ ideas!

This blog post was fuelled by YouTube playlists featuring Ariana Grande and Taylor Swift, and encouraged by the purring of my cat, Ludo.

January Favourites 2015!

I love a good monthly favourites blog or video; they always give me inspiration and ideas to try, whatever the focus of the post is. This month, I figured I’d give doing my own favourites blog a go! I’ve never really written a structured post quite like this before, so entering into the spirit of trying new things, here goes; my monthly favourites for January!

Jewellery Making:

I order a fair bit from Spellbound beads soon after Christmas so have spent quite a bit of my spare time in January playing with these sparkly treats. These are of some of the items I picked up (with a few things I bought previously).

IMG_6723
Superduos, seed beads, thread, leaves, flowers and a couple of kits!

I’ve made quite a few things with my collection already; a spikes necklace with emerald beads, a dainty purple floral necklace, a purple beaded Kumihimo bracelet and I’ve also made the Fiesta Necklace kit that you can just see in the picture. That was fun- I got to learn some new wirework techniques along the way. Maybe I’ll save that for another post!

IMG_6735
Emerald spikes necklace made for a friend’s birthday

Baking:

I decided to make my dad a cake for his Birthday at the end of January and wanted to try out a new recipe, so I delved into my Ed Kimber book, ‘Say It With Cake’ and tried out his Ginger Guinness cake. It’s the first time I’ve baked one of his recipes, and it used the strangest method I have ever used to bake a cake. My instinct is to cream together butter and sugar, beat in eggs, add flour and spices… etc but this involved me boiling Guinness and black treacle together then adding bicarbonate of soda, beating lemon zest into butter and just generally doing things in an unusual way!

10984649_10155174299900484_905500999_n
Ginger Guinness Cake

The verdict? Yum. The cake was perhaps a little dry, but not as dry as it looked, and the lemon and cream cheese icing was perfect with it. It went down a treat with Dad and the rest of my family, I’m only a little sad I can’t have another slice…!

Cooking:

Still Paella. It’s just SO good! I made a chicken and chorizo version a few weeks ago using chicken stock and it was just as tasty as my favourite seafood one from my previous post. YUM.

Technology:

My iPad and Pinterest. Perhaps not the most obvious choice for a blog about creativity but I recently made the most of a great deal online and treated myself to an iPad air. I was concerned I wouldn’t use it much but it’s been a godsend in the last 2 weeks while my phone and computer have been playing up. That aside, the display is beautiful and I absolutely love browsing Pinterest on it. I have come to the conclusion that Pinterest is probably my favourite social media site, because to me it promotes creativity and inspiration. Sitting down with a cuppa and browsing through pins and boards is one of my favourite downtime things to do just now, and I love finding tutorials and new ideas, pinning things for future reference or just gazing at beautiful photographs. I’ve created a board for DSLR photography tips, one for beautiful hand lettering, and my jewellery board is ever growing. It’s great!

Make Up:

Over the past year or so I’ve found myself becoming more interested in make up; how to use it well, which products have the best reviews, what is worth saving up for or spending very little on but still getting good quality. I think hair and make up are definitely ways of expressing your creativity, and you can be as crazy or simple with it as you like.

Rsized9
Urban Decay Naked 3 eye shadow palette

In January, I bought the Urban Decay Naked 3 palette, which is a collection of 12 pinky-browny shades, and I have used it every time I’ve worn make up since I bought it. I’m still getting used to all the shades, but my favourites so far are Burnout, Buzz, Liar, Factory and Blackheart. I am a little disappointed with Trick though, because it looks like a beautiful warm coppery colour but seems to be difficult to get it to actually show up.

I’ve also been loving using Mac Diva lipstick and also YSL Rouge Pur Couture in no. 54 to do a wintery berry coloured  lip. It’s been fun being a little bit dramatic with lip colour. I don’t do much eye make up, use only a sweep of bronzer, blusher and highlight and I’ve received several compliments on it!

IMG_6923
YSL Rouge Pur Couture No. 54

Last but not least, this isn’t a creative item but deserves a mention; my favourite book of January.

Daughter of Smoke and Bone by Laini Taylor.

This is a fantasy novel that I was given as a present by my brother and his girlfriend. It’s taken me a while to start it, but pretty much as soon as I did I was hooked! It centres around a 17 year old girl, Karou, who is an art student in Prague. She draws amazing mythical characters in her sketch books, speaks dozens of languages, is covered in tattoos, and has blue hair. I think the main character had me sold before the actual story had begun, but when you start to learn more about the fact that the characters that she draws are based on Karou’s real life… that’s when I got hooked and had to keep reading. I’m still only about a third of the way through but I’m really enjoying it so far- other than battling with Game of Thrones I haven’t read a fantasy book in a long time so its a great change!

That’s it for now- I hope you’ve enjoyed reading this post! Let me know if you’d like to read more blogs like this from me, what your favourite creative items are for January, and what you think of any of the things I’ve mentioned in the comments!

A Day of Cooking

After a trip to Devon with my family I was inspired to make both some scones and some marmalade, so on a recent day off that is what I did!

20140711-082638-30398848.jpg

As it was July rather than January I didn’t have access to any Seville oranges, which are the variety normally used in marmalade making presumably due to their flavour and the levels of pectin they have, which is what makes jams set. Instead, I decided to make ‘3 fruit marmalade’ which uses grapefruit, lemons and regular oranges. I have made this once before, but I normally use my mum’s old pressure cooker so this time I decided to use a different method: the whole fruit method, which involves boiling the fruit before chopping the peel and removing the insides. In theory it’s quicker as there’s no soaking the peel overnight, but it uses more gas on the hob and it actually took up most of the day as I needed to fit it round other things.

The final product was really tasty and made about 2.5 medium sized jars, though I must admit I got distracted and boiled mine for a few minutes too long, resulting in there not being very much of the ‘jelly’ part of the marmalade!

20140711-083534-30934613.jpg

In between marmalade making, I also made a batch of yummy scones! I loosely followed a recipe by Mary Berry, substituting some of the self raising flour for combination of whole meal bread flour and plain plus some baking powder to still give them a rise. I also added a teaspoon of mixed spice. I decided to cut the scones into wedges instead of using a round cutter to keep kneading to a minimum. The dough was very, very sticky so it was hard to handle and cut so I made a star shape in the dough and kept all 8 wedges together rather than separating the scones at this stage. This was supposed to keep them more moist. However I baked them for about 10 minutes at gas mark 7 and found that they weren’t cooked completely in the middle! I cut them through properly and turned the oven down to gas mark 5. After about 5 minutes I had the idea of separating them out too, then cooked the for a further 10 minutes. I think in future, 10 minutes together at gas mark 7 then 10-15 minutes cut and separated at gas mark 5 would do the trick, though maybe it’s work experimenting with keeping them at gas mark 5 for the duration.

20140711-084516-31516605.jpg

Either way, these ones had a good rise and taste scrummy with a little butter and home made strawberry jam.

DIY Handmade Chocolates!

20140130-161645.jpg

January birthdays are always difficult. I find I tend to spend a lot of time in the build up to Christmas thinking about pressies and what friends and family would like or what would make them feel special, but as soon as Christmas is over, all my ideas go out the window! However, my Dad (who is quite difficult to buy for anyway) has a birthday at the end of January, so each year I have to try to save some present-coming-up-with-brain-energy post Christmas. During the last couple of years I’ve made him whisky marmalade and fudge which have both gone down well, so this year I decided to carry on with the hand made tasty treat theme and make him some chocolates.

Previously, I’ve made some yummy chocolate truffles by combining cream cheese, cocoa powder and icing sugar and then rolling the mixture into balls and coating them in dessicated coconut, chopped nuts or cocoa powder. This time though, I wanted to try something new so I bought a silicone tray of chocolate moulds in assorted shapes to try to make the finished chocolates look more professional. I’ve never used a silicone mould for chocolate before other than in an attempt to make teacakes once, so if anyone has any tips on using them effectively or pictures of chocolates they’ve made using them do let me know!

My Dad and I always used to sneak into the larder and eat raisins together when I was little so I decided to include some in my recipe, but to make the gift more interesting than simply chocolate coated raisins I soaked them in amaretto before using them.

20140130-160206.jpg

I used both white and dark melted chocolate and really just made it up as I went along, putting raisins in the bottom of some moulds and then adding the chocolate, in the centre of others after forming a chocolate shell in the mould or pushing them into almost full moulds of chocolate.

I think they turned out quite well, they taste great and Dad really liked them so I’m pleased! If you get a chance to try these perhaps try soaking the raisins in rum or using a different fruit- I think dried cherries soaked in cherry brandy or just normal brandy could be delicious!

I also made my Dad’s card using origami this year. I first got into origami when I was about 11 or 12, I love the neatness of the finished product, though I can never make my edges line up perfectly! For this card I made an origami star using a tutorial from origami-instructions.com which you can find here, then glued it to the front of a plain white card.

IMG_3115And that’s it! Now to start thinking about February birthday and valentines presents…!

Do baked eggs count as baking?

As its a bank holiday and I’m at home for lunch I decided to try cooking something a little different: baked eggs. I’ve never baked them before but I do love a good poached egg on toast, so I figured I’d give them a go!

First I greased a couple of ramekins with butter. Actually I don’t know if these are proper ramekins, but they’re about the right size – I love how earthy they look!

In one ‘dish’ I put enough chopped up ham to cover the bottom and then broke an egg over the top. I used a fork to make sure the white covered all the ham, being careful not to spike the yolk! In the second dish I broke the egg straight in and then covered it with grated cheese. Lastly, I sprinkled a bit of cayenne pepper over the top of both and popped them into the oven (preheated to gas mark 5) on a baking tray.
Image

Pre baked eggs…

I baked them for about 12 mins, but they looked a bit wobbly still so left them for another 5, though unfortunately this meant they lost most of the yolk’s runny-ness. About 15 probably would have been perfect! Then I served them with a bit of toast.

Image

Baked eggs! (Please excuse the rather old baking tray…)

They were tasty! Next time I think I’ll try baking them atop a bit of cooked spinach and for about 14-15 minutes. If you have a go at making them or have any ideas for other toppings/ under-ings, do let me know!

Ooh, and I got my inspiration from a couple of recipes on the trusty BBC Good Food website:

http://www.bbc.co.uk/food/recipes/bakedeggs_8634

http://www.bbcgoodfood.com/recipes/4553/spinach-baked-eggs-with-parmesan-and-tomato-toasts

Strawberry Cupcakes!

Image

This rather girlie looking cupcake is one of a batch I made this week for my close friend Lauren for her birthday. Last October I was given a copy of the Great British Bake Off ‘Showstoppers’ book, so these were made using the recipe for English Summer Cupcakes – tasty strawberry chunks in a vanilla sponge cake mixture.

…Except I never really follow a recipe completely… so the cupcake bit is right (except for a lack of vanilla essence, which I forgot to buy) but I made my own frosting by adding strawberry flavouring and pink food colouring to a buttercream mixture. One of the reasons I love making cupcakes is purely selfish – I really enjoy baking and love trying to be creative with icing. It’s always fun baking for a special occasion though and I try to cater my cupcakes to the person they are for – while I wouldn’t automatically think of pink for Lauren I know she likes strawberry cakes and the stars are a bit of fun, which is definitely more ‘her’!

Image

For some strange reason I can’t seem to get this last picture to turn around… but here are a few more examples of the cakes. They are super yummy too – I’m eating one with a cup of coffee as I write this!